Cyberdrive Core User Manual
Download PDF
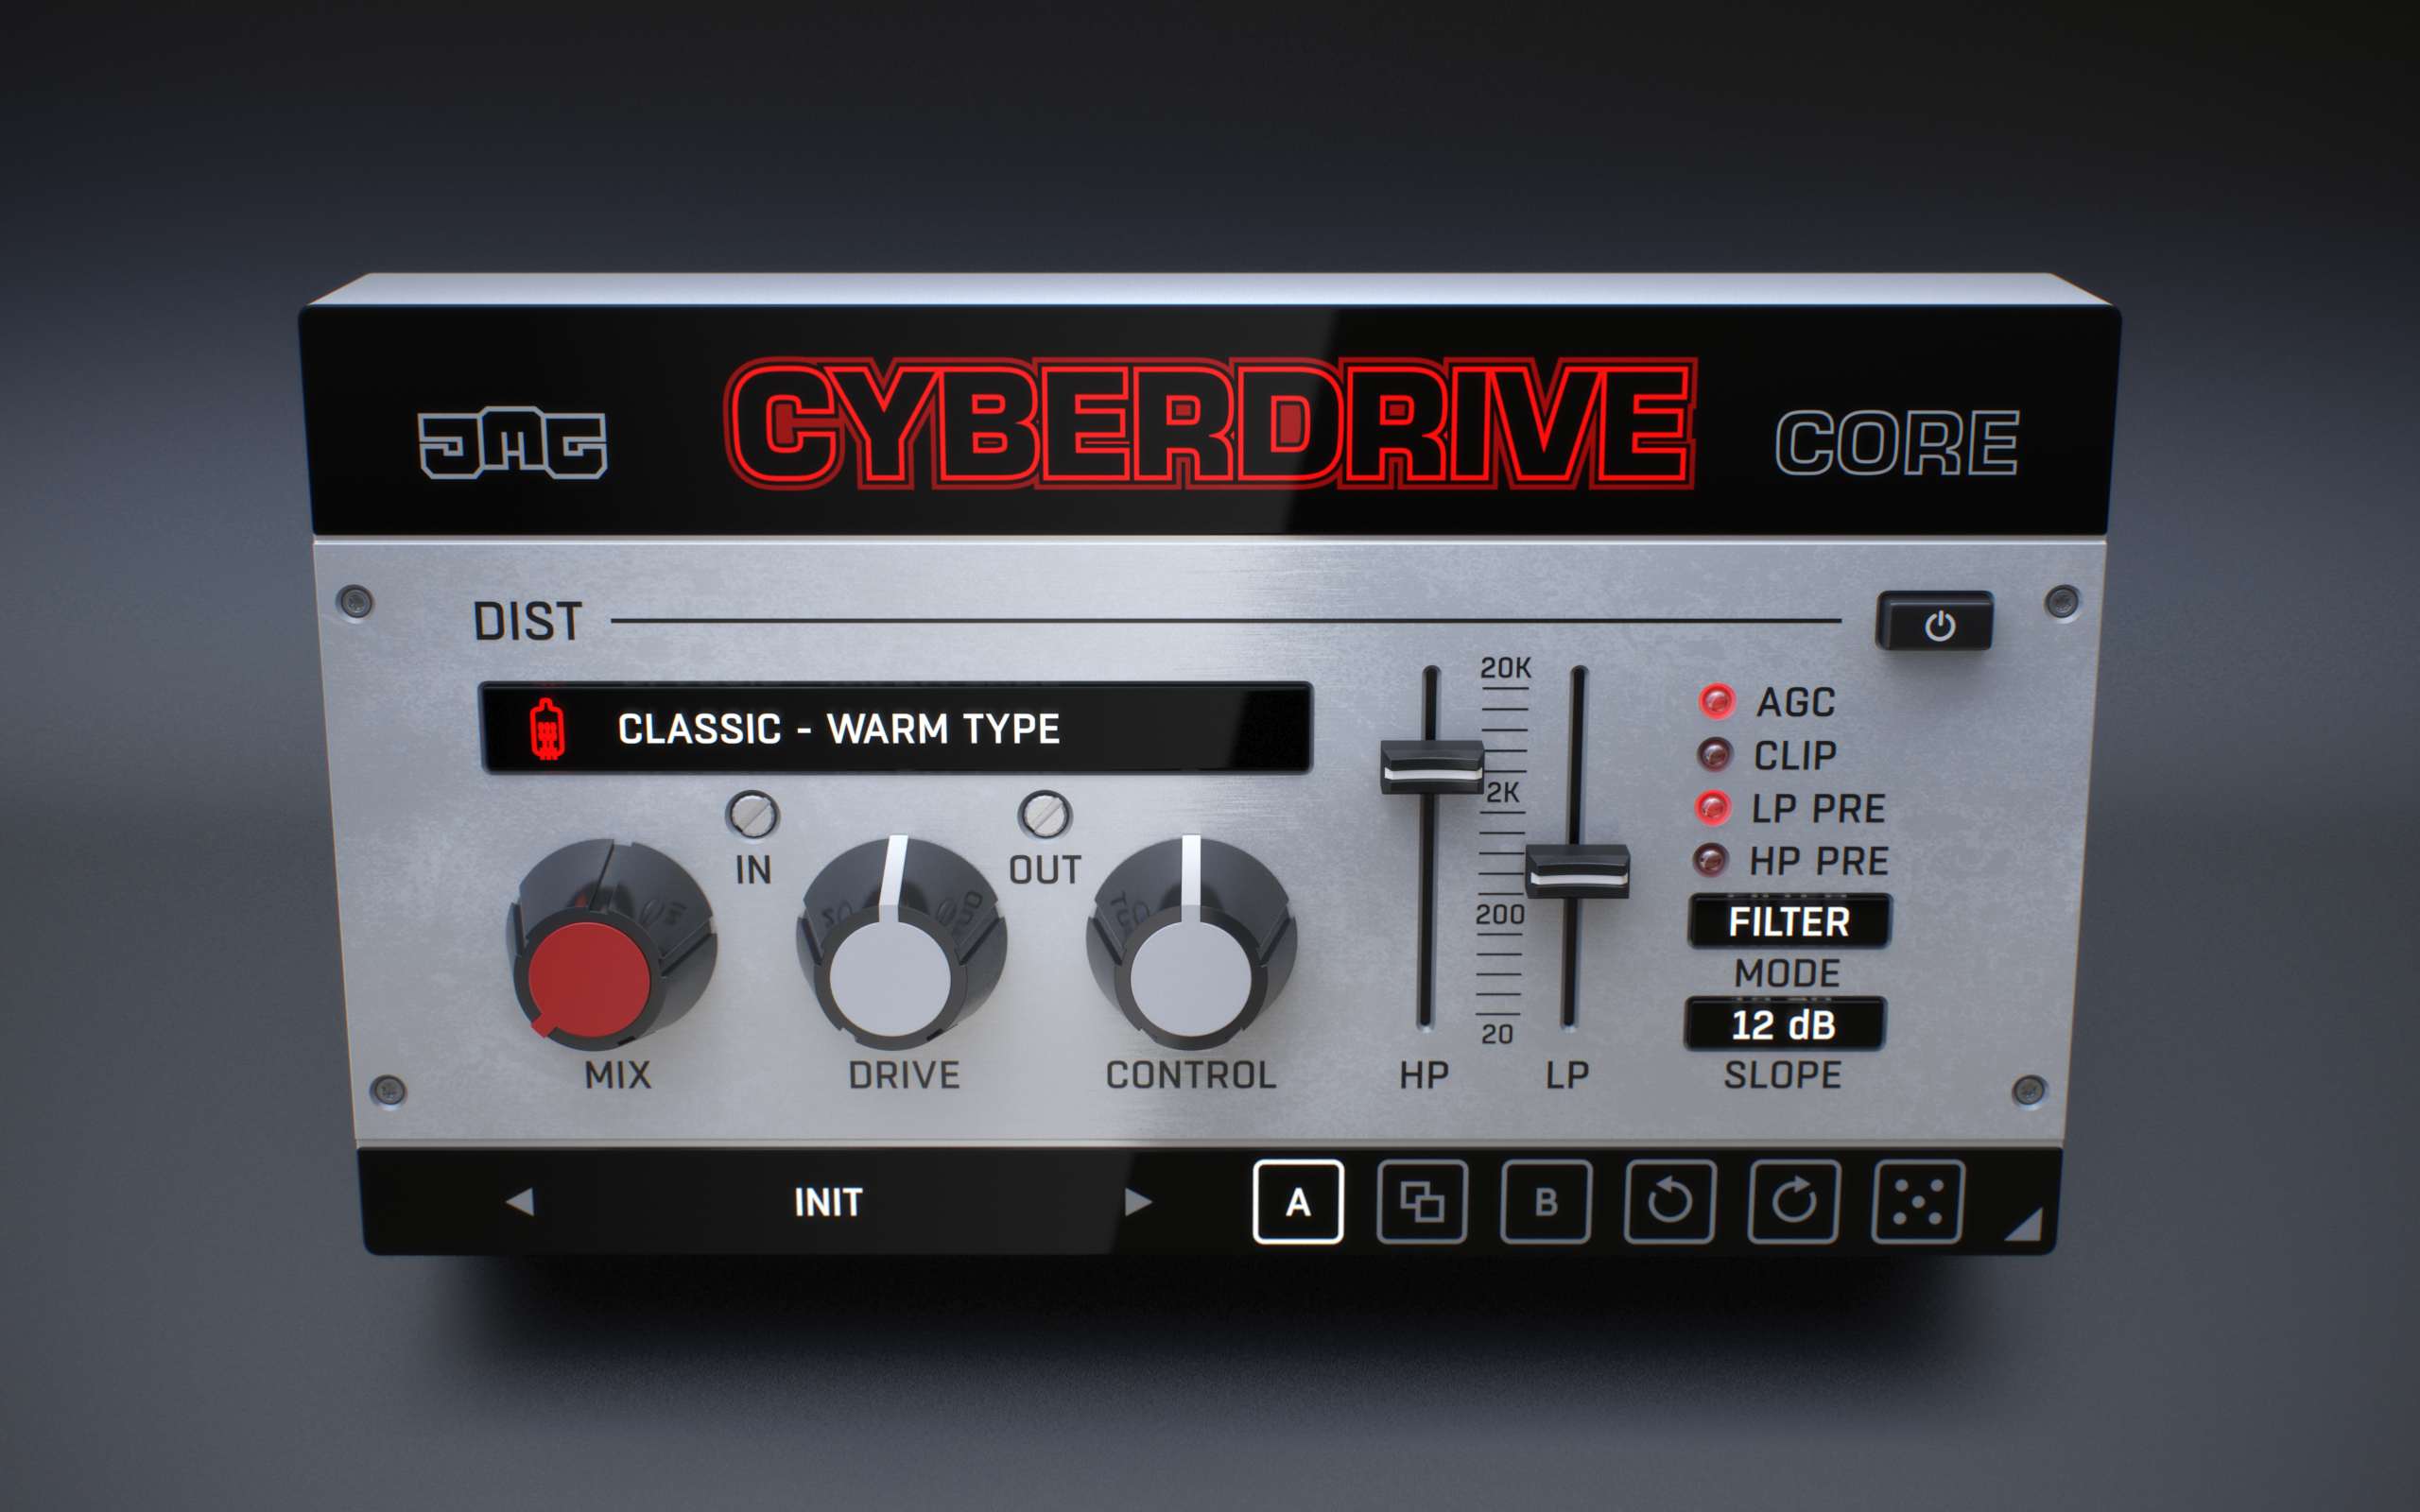
Dist
MODEL - selects one of the 64 distortion types. The models are grouped into the following 8 categories:
CLASSIC - contains models of analogue hardware, such as tube, tape, transistor, diode etc
MODERN - contains complex multiband distortion, folding and companders.
PIXEL - contains various forms of bit-crushing, rate reduction, digital degradation, noise, glitches etc
SHAPE - contains wave-shapers of various types, including rectify, foldback, asymmetric clipping etc
AMP - contains models of famous guitar and bass amplifiers.
PEDAL - contains models of famous guitar pedals.
DOOM - contains extremely heavy custom distortion types.
FREAK - contains experimental distortion techniques such as ring-mod, feedback, FM, spectral etc
MIX - controls the dry/wet mix.
DRIVE - controls the amount of level going into the distortion. It works differently depending on the distortion model, but typically speaking, it drives the distortion harder, resulting in more harmonics and compression.
CONTROL - changes the character of the distortion, the behaviour is different in each model. It could be changing bit depth, the curve of a wave-shaper, a filter inside a saturated feedback, bias offset or many other things.
FILTER - each distortion module contains a powerful and flexible filter system used to shape the tone and character of the distortion stage.
MODE - selects the type from:
FILTER - is a high-pass and low-pass filter, everything above and below the set frequencies will be filtered out.
MULTI - is a multiband crossover, everything above and below the set frequencies will pass through as a dry signal.
SLOPE - selects the filter or crossover type from 6dB, 12dB, 24dB, 48dB and 96 dB.
HP - controls the frequency of the high-pass filter or low-band crossover (depending on the mode)
LP - controls the frequency of the low-pass filter or high-band crossover (depending on the mode)
HP PRE - selects if the high-pass filter will be positioned before the distortion.
LP PRE - selects if the low-pass filter will be positioned before the distortion.
AGC - enables automatic gain compensation. It constantly measures the input loudness and compensates the output to match; therefore, it can affect the dynamics. Making a static gain compensation manually using the "out" control is safer.
CLIP - enables a hard clipper on the output of the distortion module to prevent any peaks above 0dB.
Right-click Menu
Right-click anywhere in the plugin background with the right mouse button, and you will get access to the following features.
Scale GUI precisely by percentage.
Get the version info.
Change oversampling settings
Access product web page, reach support and access online documentation.
Contact support
Open the presets folder (to add, arrange or delete presets manually)
Activate/Deactivate the plugin
Access Licence Manager (to activate or deactivate the plugin or several plugins at the same time)
Disable/Enable GPU Acceleration.
Right-click any control (knob, button) to access help for the particular parameter.
Presets
The plugin comes with a set of presets, which should do the trick for most cases or give you a good starting point when tweaking your sound. Access them by clicking the preset field directly. You can save and manage your own presets there as well. In your computer, presets are stored in the following paths:
C:/Users/username/AppData/Roaming/UnitedPlugins/PRESETS/PluginID
MAC: ~/Library/Application Support/UnitedPlugins/PRESETS/PluginID
Installation and maintenance
Installation is a quick and simple process involving downloading and using a standard installer on both platforms, Windows and Mac OS X. The installer places the plugins and presets into proper locations so that your DAW can easily find it. The plugin is available for all relevant interfaces: VST, VST3, AAX and AU. Note that on OS X since High Sierra you may need to restart your computer to make your DAW find new plugins.
If you are having trouble, please contact us at support@unitedplugins.com.
Updating
Updating the plugin to the newest version is as simple as using the UnitedPluginsManager (in download section of our webpage).
Uninstallation
Windows
You can either use the link to the uninstaller in the start menu by typing CyberdriveCore for example or it can be accessed via Control panels / Applications /
macOS X
First, delete the plugin files manually from:
AU: /Library/Audio/Plug-Ins/Components
VST: /Library/Audio/Plug-Ins/VST
VST3: /Library/Audio/Plug-Ins/VST3
AAX: /Library/Application Support/Avid/Audio/Plug-Ins
Then if you really want to get rid of all data created by the plugin, remove the following folders as well:
HOME/Documents/JMGSound/Cyberdrive
HOME/Library/Application support/JMGSound/Cyberdrive
Note: Since OS X 10.7 (Lion), many folders are marked as hidden by default. To make them visible again in Finder, please follow this tutorial:
https://ianlunn.co.uk/articles/quickly-showhide-hidden-files-mac-os-x-mavericks/
Trial and activation
Cyberdrive is initially in demo mode, which lets you evaluate the plugin. Try it in your mixing/mastering sessions, and make sure it really does the trick. When ready, purchase a licence from our shop or any of our resellers. You will receive a so-called licence file, which you download to your computer. The plugin displays an ACTIVATE button when in trial mode. Click it and select the licence file. The plugin will check the licence and activate it on your computer. After you restart your DAW, the plugin will be activated and will work indefinitely without restrictions. You can use the plugin on all your computers.
Support
Now that you’ve taken the time to learn all about Cyberdrive, enjoy and make your sound awesome! If our plug-ins helped you take your production to the next level, let us know, we’d love to hear from you and what you were able to create with our software.
If you encounter any problems, we offer free technical support for all registered users. Start with the frequently asked questions here:
http://www.unitedplugins.com/faq
If you need further assistance, you can find our Customer Support contact form at:
http://www.unitedplugins.com/contact
You can also reach our support staff by e-mail at:
support@unitedplugins.com