Bitpunk Manual
SWAP SECTION
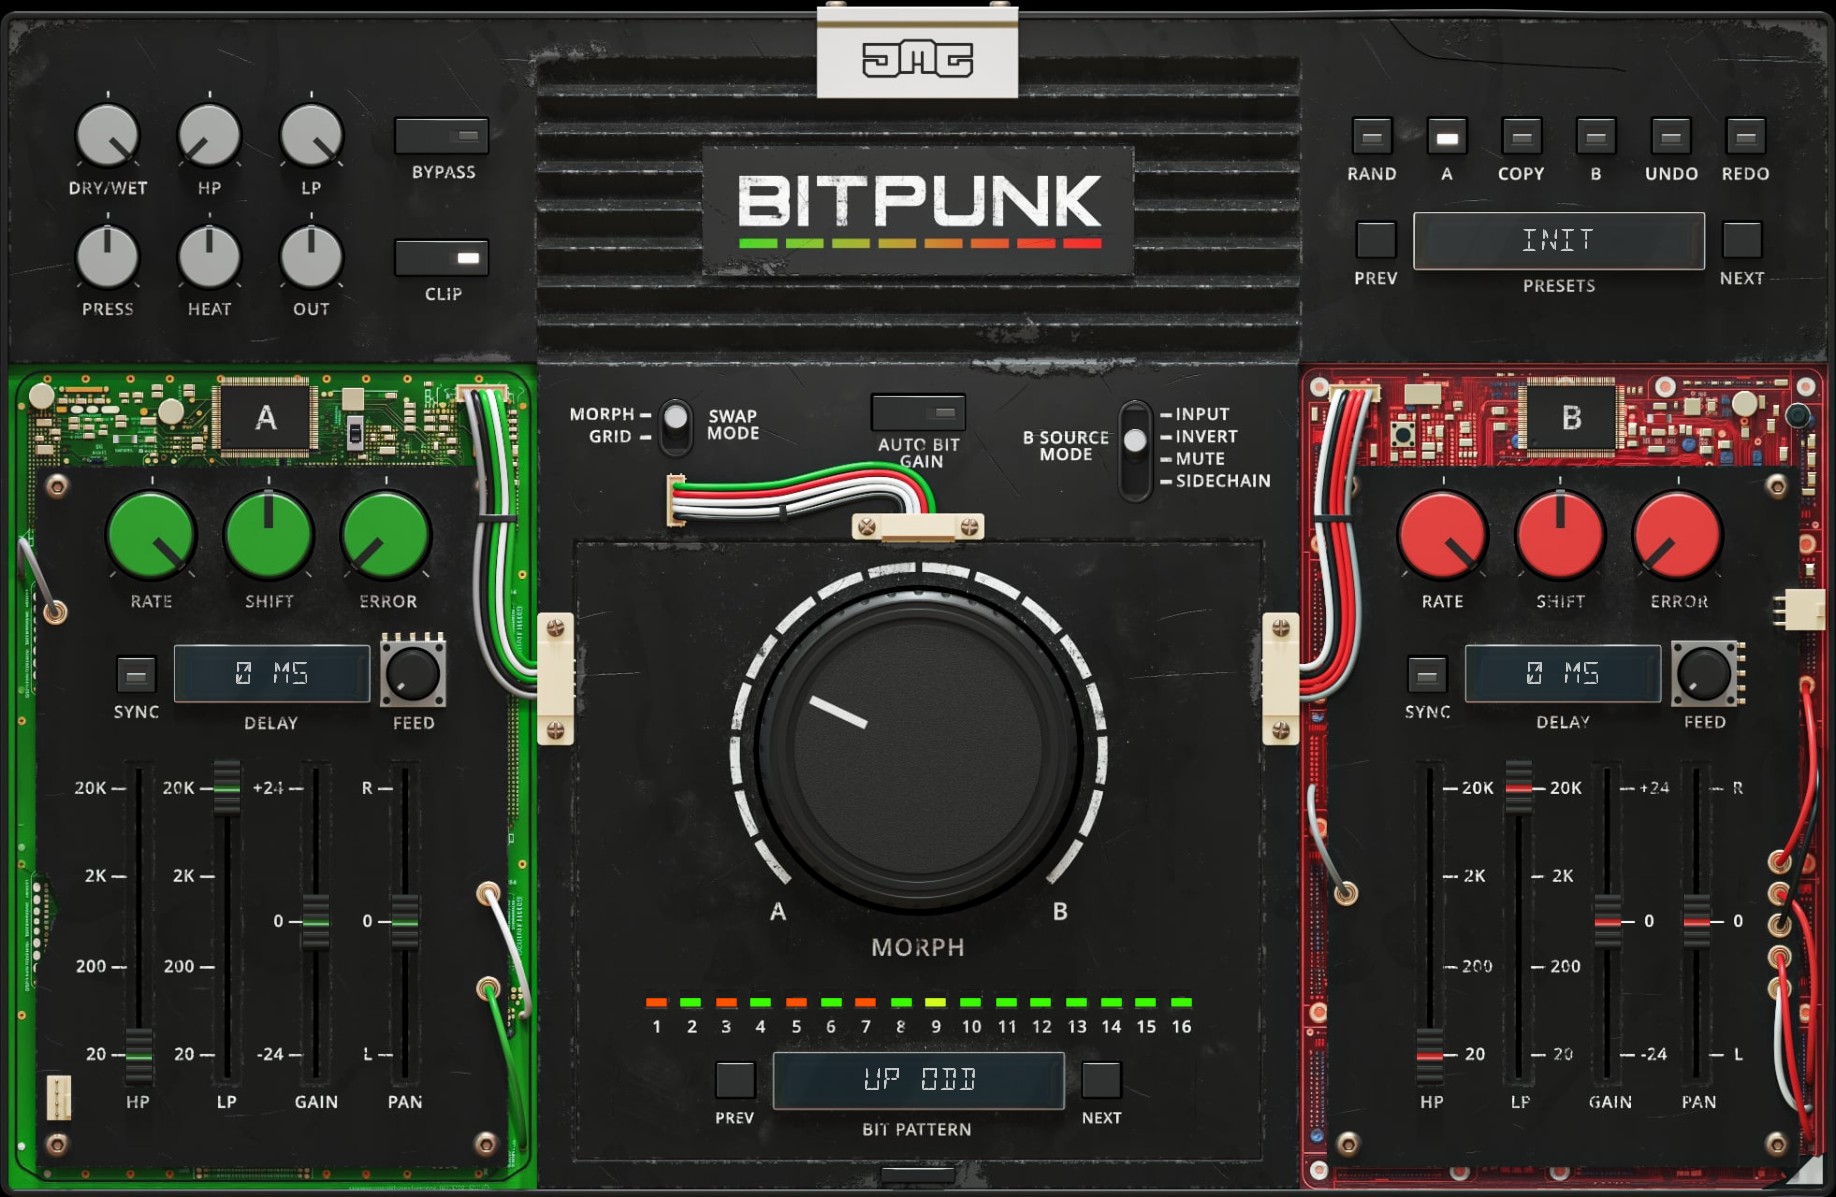
This section contains the controls in the middle of the plugin. At the heart of Bit Punk is the bit-swapping engine. It takes two sources (A & B) and swaps the bits from one to the other. A is always the input of the plugin, while B can be selected using the B SOURCE control.
MORPH - progressively swaps the bits from A to B. Each bit is individually crossfaded with the next to enable smooth transitions between bits.
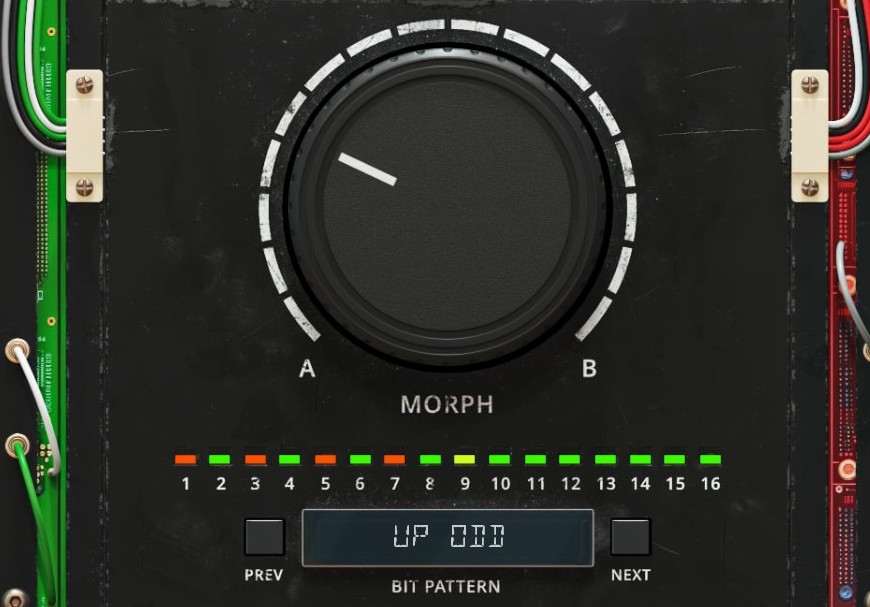
BIT PATTERN - selects the order in which the bits will swap when using the MORPH knob.
EVEN - 2, 4, 6, 8, 10, 12, 14, 16, 1, 3, 5, 7, 9, 11, 13, 15.
ODD - 1, 3, 5, 7, 9, 11, 13, 15, 2, 4, 6, 8, 10, 12, 14, 16.
DUAL - 1, 9, 2, 10, 3, 11, 4, 12, 5, 13, 6, 14, 7, 15, 8, 16.
QUAD - 1, 5, 9, 13, 2, 6, 10, 14, 3, 7, 11, 15, 4, 8, 12, 16.
SERIAL - 1, 2, 3, 4, 5, 6, 7, 8, 9, 10, 11, 12, 13, 14, 15, 16.
UP - goes from first to last.
DOWN - goes from last to first.
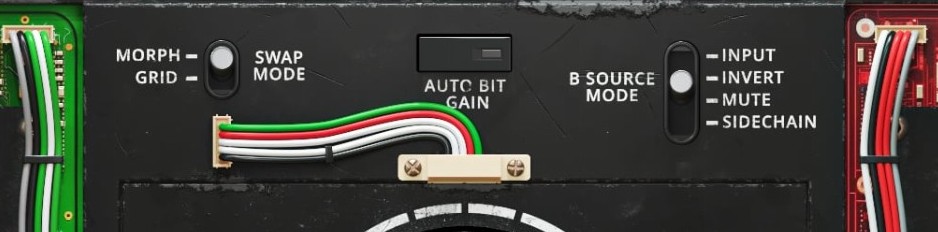
B SOURCE - selects where the B channel will get its signal from. INPUT is a duplicate of A (therefore, you must use the FX to create differences for the bit swapping to have an effect). INVERT is the same as INPUT, except the channel is phase inverted; this allows for bit inverting. MUTE silences the B channel; this allows for bit muting (which is the same as bit crushing). SIDECHAIN allows a custom input into channel B; this can be used to morph between two completely different signals or use external FX to create the differences between A and B.
SWAP MODE - selects how the bits will be swapped. MORPH offers a knob that continuously crossfades smoothly through all the bits; this mode is great for transitions and automating. GRID allows each bit to be independently swapped from A to B; this mode is good for setting a custom bit pattern.
GRID - selects if each bit will be taken from channel A or B. Simply click the switch to swap it, and the colour will change to reflect this.
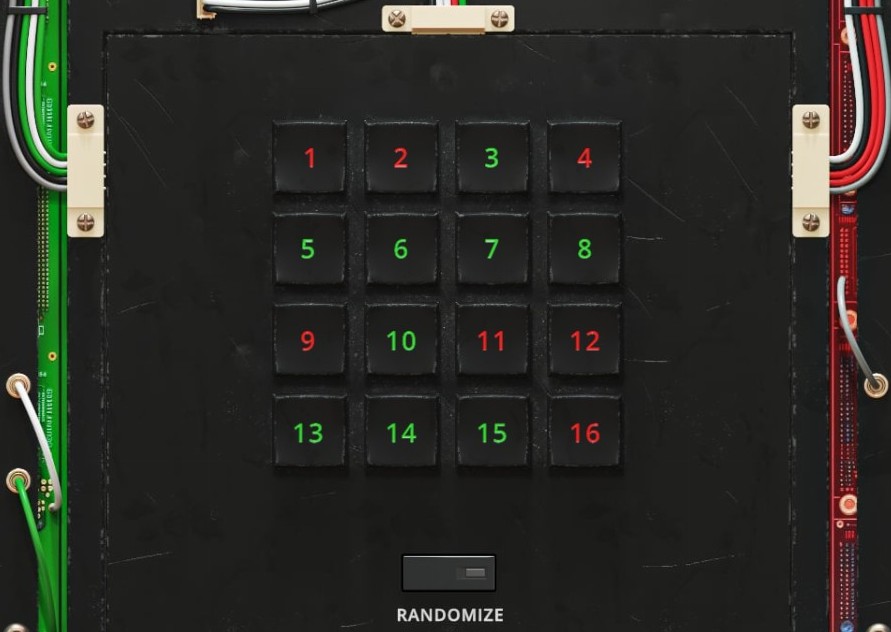
RANDOMIZE - generates a random bit pattern.
AUTO BIT - enables an auto-gain algorithm that is calculated on a per-bit basis. It is designed to keep a more consistent level when swapping bits. It can change the character of the FX, and you may want to disable it if you wish to drive the compression and saturation harder, so it is best to try with and without to see which sounds best. Note that this is not an auto-gain for the entire plugin's input and output.
A & B SECTIONS
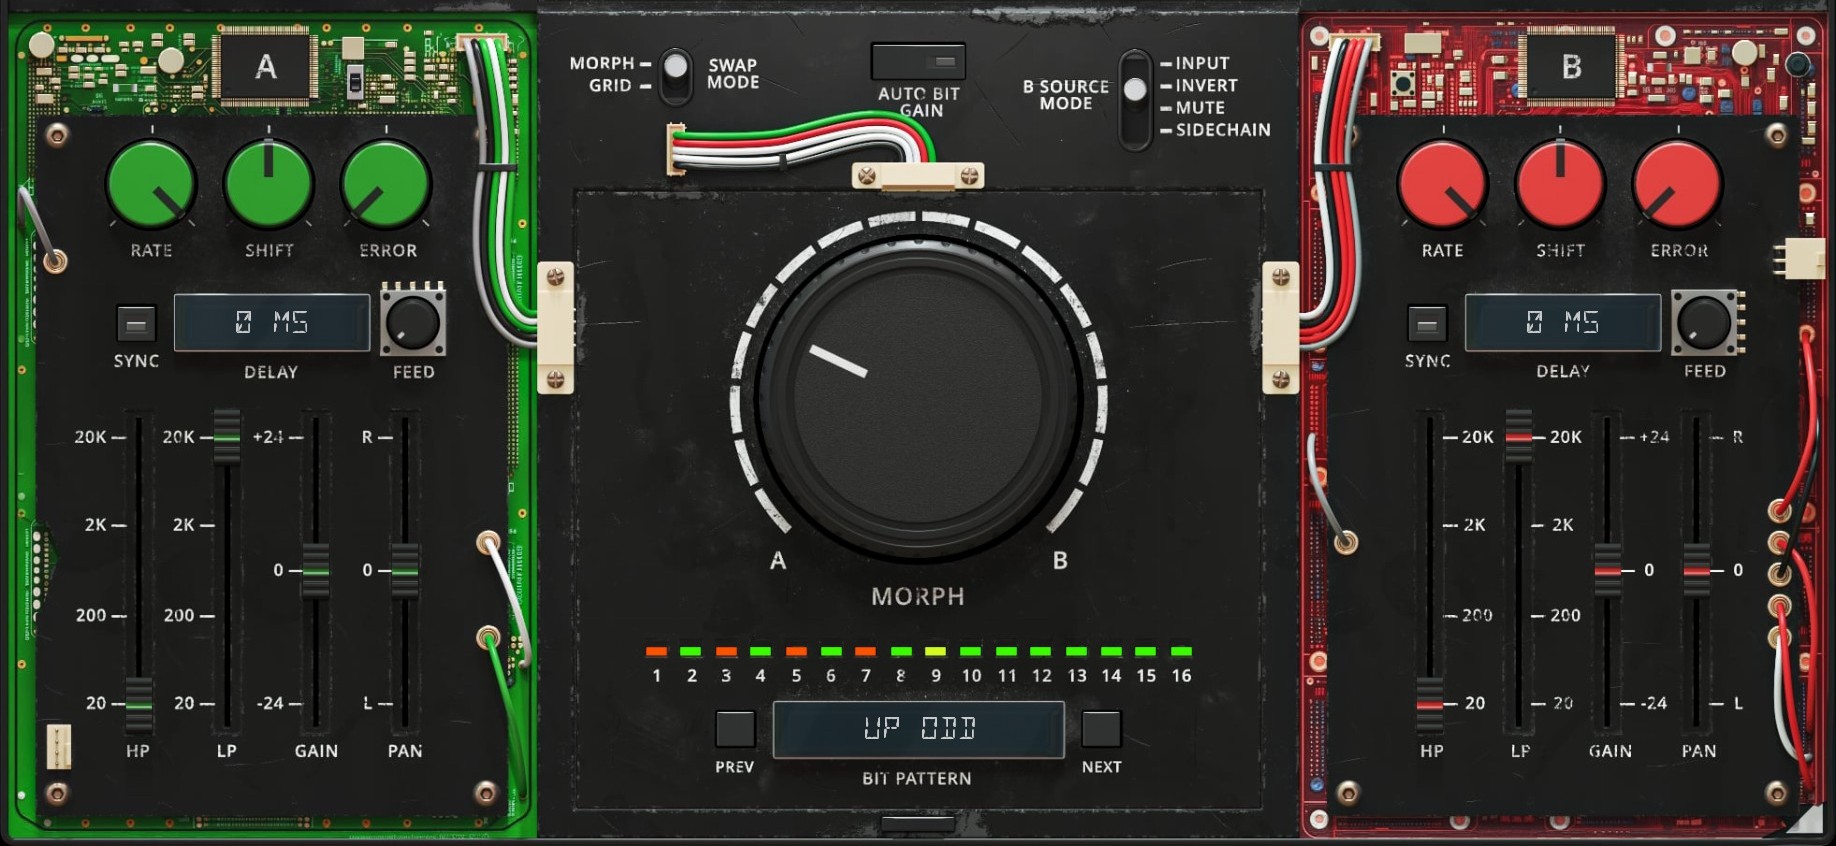
To the left and right, you can find the A and B channel controls, colour-coded green and red. The controls here are per-channel and are designed to create differences between A and B for the bit-swapping to have an effect.
GAIN - controls the level of the signal, with a range of +/- 24dB. It can be used to starve (spluttering and gated) or push (overdriven and sustained) the bit swap engine.
PAN - controls the panorama for the channel. It can be used to add stereo width to the effect and swap between left & right channels.
HP - controls the frequency of the high-pass filter.
LP - controls the frequency of the low-pass filter.
DELAY TIME - controls the delay time in milliseconds. Short values create cool phasing effects.
DELAY SYNC - controls the delay time in measures synced to the host tempo.
FEED - controls the amount of feedback for the delay line. It also feeds the signal back into the frequency shifter.
SYNC - selects if the delay will be synced or free.
RATE - controls the frequency of the rate reducer. Use a little to get a crunchy top end or smash it hard for lo-fi broken arcade FX.
SHIFT - controls the frequency of the frequency shifter. It uses a dirty lo-fi algorithm with square-wave modulation.
ERROR - controls the amount of random stuttering and skipping. Controls the amount of random stuttering and skipping for channel A. Values above 50% also introduce playback speed errors, resulting in pitch glitches.
MASTER SECTION
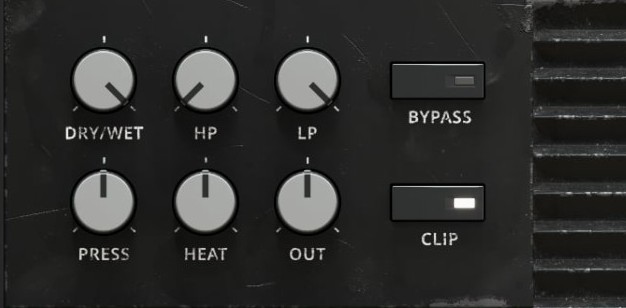
DRY/WET - controls the mix of processed and unprocessed signals.
PRESS - controls the amount of compression. It uses a custom model of a famous aggressive compressor to "stress" the sound.
HEAT - controls the amount of saturation. The algorithm is based on soft clipping diodes.
HP - controls the frequency of the master high-pass filter.
LP - controls the frequency of the master low-pass filter.
CLIP - enables a hard clipper on the output of the plugin. It is used as a safety feature, and we recommend keeping it on as things can get very loud with this plugin. It sounds great and you can use the OUT to drive even more signal into it. But it can be disabled if you wish to limit the signal externally from the plugin.
OUT - controls the output gain of the wet signal. It can be used to compensate for loudness differences between input & output or to drive the hard clipper.
Right-click
Right-click anywhere in the plugin background with the right mouse button, and you will get access to the following features.
Scale GUI precisely by per-cent.
Get the version info.
Change oversampling settings (switch to up to 8x oversampling)
Access product web page, reach support and access online documentation.
Contact support
Open presets folder (to add, arrange or delete presets manually)
Activate/Deactivate the plugin
Access Licence manager (to activate or deactivate the plugin or several plugins at the same time)
Disable/Enable GPU Acceleration.
Right-click any control (knob, button) to access help for the particular parameter.
Service Menu
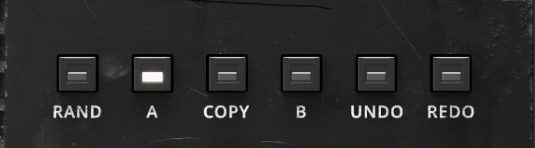
COPY - Takes the settings from the currently selected A or B slot and copies them into the other slot.
A & B - Switches between two states of the plugin. This can be used to make better decisions by directly comparing the before and after.
UNDO/REDO - Will revert back one step to help avoid the accidental change of parameter values.
RAND - randomizes all parameters using an intelligent randomization algorithm.
Presets
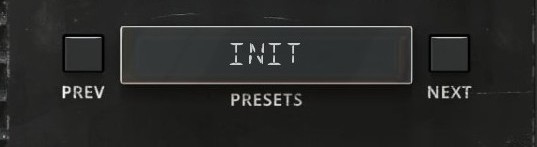
The plugin comes with a set of presets, which should do the trick for most cases or give you a good starting point when tweaking your sound. Access them by clicking the preset field directly. You can save and manage your own presets there as well. In your computer, presets are stored in the following paths:
Windows:
C:\Users\username\Documents\JMGSound\Bitpunk
macOS X:
HOME/Documents/JMGSound/Bitpunk
Installation and maintenance
Installation is a quick and simple process involving downloading and using a standard installer on both platforms, Windows and Mac OS X. The installer places the plugins and presets into proper locations so that your DAW can easily find it. The plugin is available for all relevant interfaces: VST, VST3, AAX and AU. Note that on OS X since High Sierra you may need to restart your computer to make your DAW find new plugins.
If you find yourself in trouble, please contact us via support@unitedplugins.com.
Updating
Updating the plugin to the newest version is as simple as using the newest installer.
Uninstallation
Windows
You can either use the link to the uninstaller in the start menu by typing Bitpunk for example or it can be accessed via Control panels / Applications /
macOS X
First delete the plugin files manually from:
AU: /Library/Audio/Plug-Ins/Components
VST: /Library/Audio/Plug-Ins/VST
VST3: /Library/Audio/Plug-Ins/VST3
AAX: /Library/Application Support/Avid/Audio/Plug-Ins
Then if you really want to get rid of all data created by the plugin, remove the following folders as well:
HOME/Documents/JMGSound/Bitpunk
HOME/Library/Application support/JMGSound/Bitpunk
Note: Since OS X 10.7 (Lion), many folders are marked as hidden by default. To make them visible again in Finder, please follow this tutorial:
https://ianlunn.co.uk/articles/quickly-showhide-hidden-files-mac-os-x-mavericks/
Trial and activation
Bitpunk is initially in demo mode, which lets you evaluate the plugin. Try it in your mixing/mastering sessions and make sure it really does the trick. When ready, purchase a licence from our shop or any of our resellers. You will receive a so-called licence file, which you download to your computer. The plugin displays an ACTIVATE button when in trial mode. Click it and select the licence file. The plugin will check the licence and activate the licence on your computer. After you restart your DAW, the plugin will be activated and will work indefinitely without restrictions. You can use the plugin on all your computers.
Support
Now that you’ve taken the time to learn all about Bitpunk, enjoy and make your sound awesome! If our plug-ins helped you take your production to the next level, let us know, we’d love to hear from you and what you were able to create with our software.
If you encounter any problems, we offer free technical support for all registered users. Start with the frequently asked questions here:
http://www.unitedplugins.com/faq
If you need further assistance, you can find our Customer Support contact form at:
http://www.unitedplugins.com/contact
You can also reach our support staff by e-mail at:
support@unitedplugins.com
Common functions
(Available in most plugins)
Activate button - Opens a browser to locate the licence file to unlock the full version. (This can easily be handled by UnitedPlugins Manager right after installation)
Toolbar
BITPUNK features several standard controls, which can improve your workflow.
A, B and Copy buttons - The plugin remembers two sets of settings, A and B. Clicking any of these two buttons switches between these two settings. The selected one is highlighted in red. This is a great way for A/B checking and selecting the best settings. The "Copy" button copies the current settings to the other slot (if A is currently selected, the button will copy the current settings to slot B).
Presets and right and left arrows - The plugin comes with a set of presets, which should do the trick for most cases. Access them using the right and left arrows or by clicking the preset field directly. There, you can save and manage your own presets as well.
Undo/Redo - Will revert back one step to help avoid the accidental change of parameter values.
Background Right-Click Menu
Right-click anywhere in the plugin background with the right mouse button, and you will get access to the following features.
Scale the GUI precisely by percentage.
Get the version info.
Access the product web page, reach support and the online documentation.
Contact support
Open the presets folder (to add, arrange or delete presets manually)
Activate/Deactivate the plugin
Access Licence Manager (to activate or deactivate the plugin or several plugins at the same time)
Disable/Enable GPU Acceleration.
Disable/Enable Intelligent sleep on silence function that disables the plugin when no sound is on input or output to save the CPU power.
Parameter Right-Click Menu
Right-click any parameter to call up a menu that gives you access to:
The parameter description
Parameter reset
Double-click Menu
Some parameters let you access more accurate numeric settings by double-clicking the knobs.
Presets and left-right arrows
The plugin comes with a set of presets, which should do the trick for most cases or give you a good starting point when tweaking your sound. Access them using the right and left arrows, or by clicking the preset field directly. You can save and manage your own presets there as well. In your computer, presets are stored in the following paths:
Windows:
c:\Users\USER NAME\AppData\Roaming\UnitedPlugins\PRESETS\BITPUNK
macOS X:
/Users/username/Library/Application Support/UnitedPlugins/PRESETS/BITPUNK
(Right-Click the plugin background to open the preset folder directly)
Installation and maintenance
Use UnitedPluginsManager (Downloads section) to install, uninstall, update, and activate the plugin.
Support
If you find yourself in trouble, please contact us via support@unitedplugins.com.