QuickBass Manual
Compressor

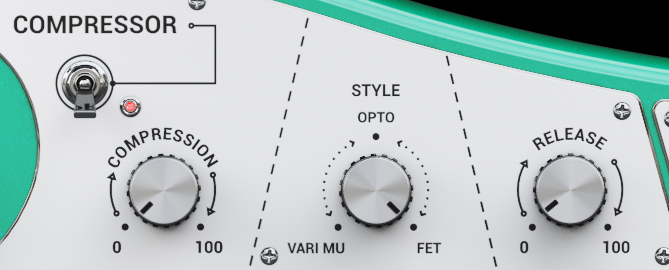
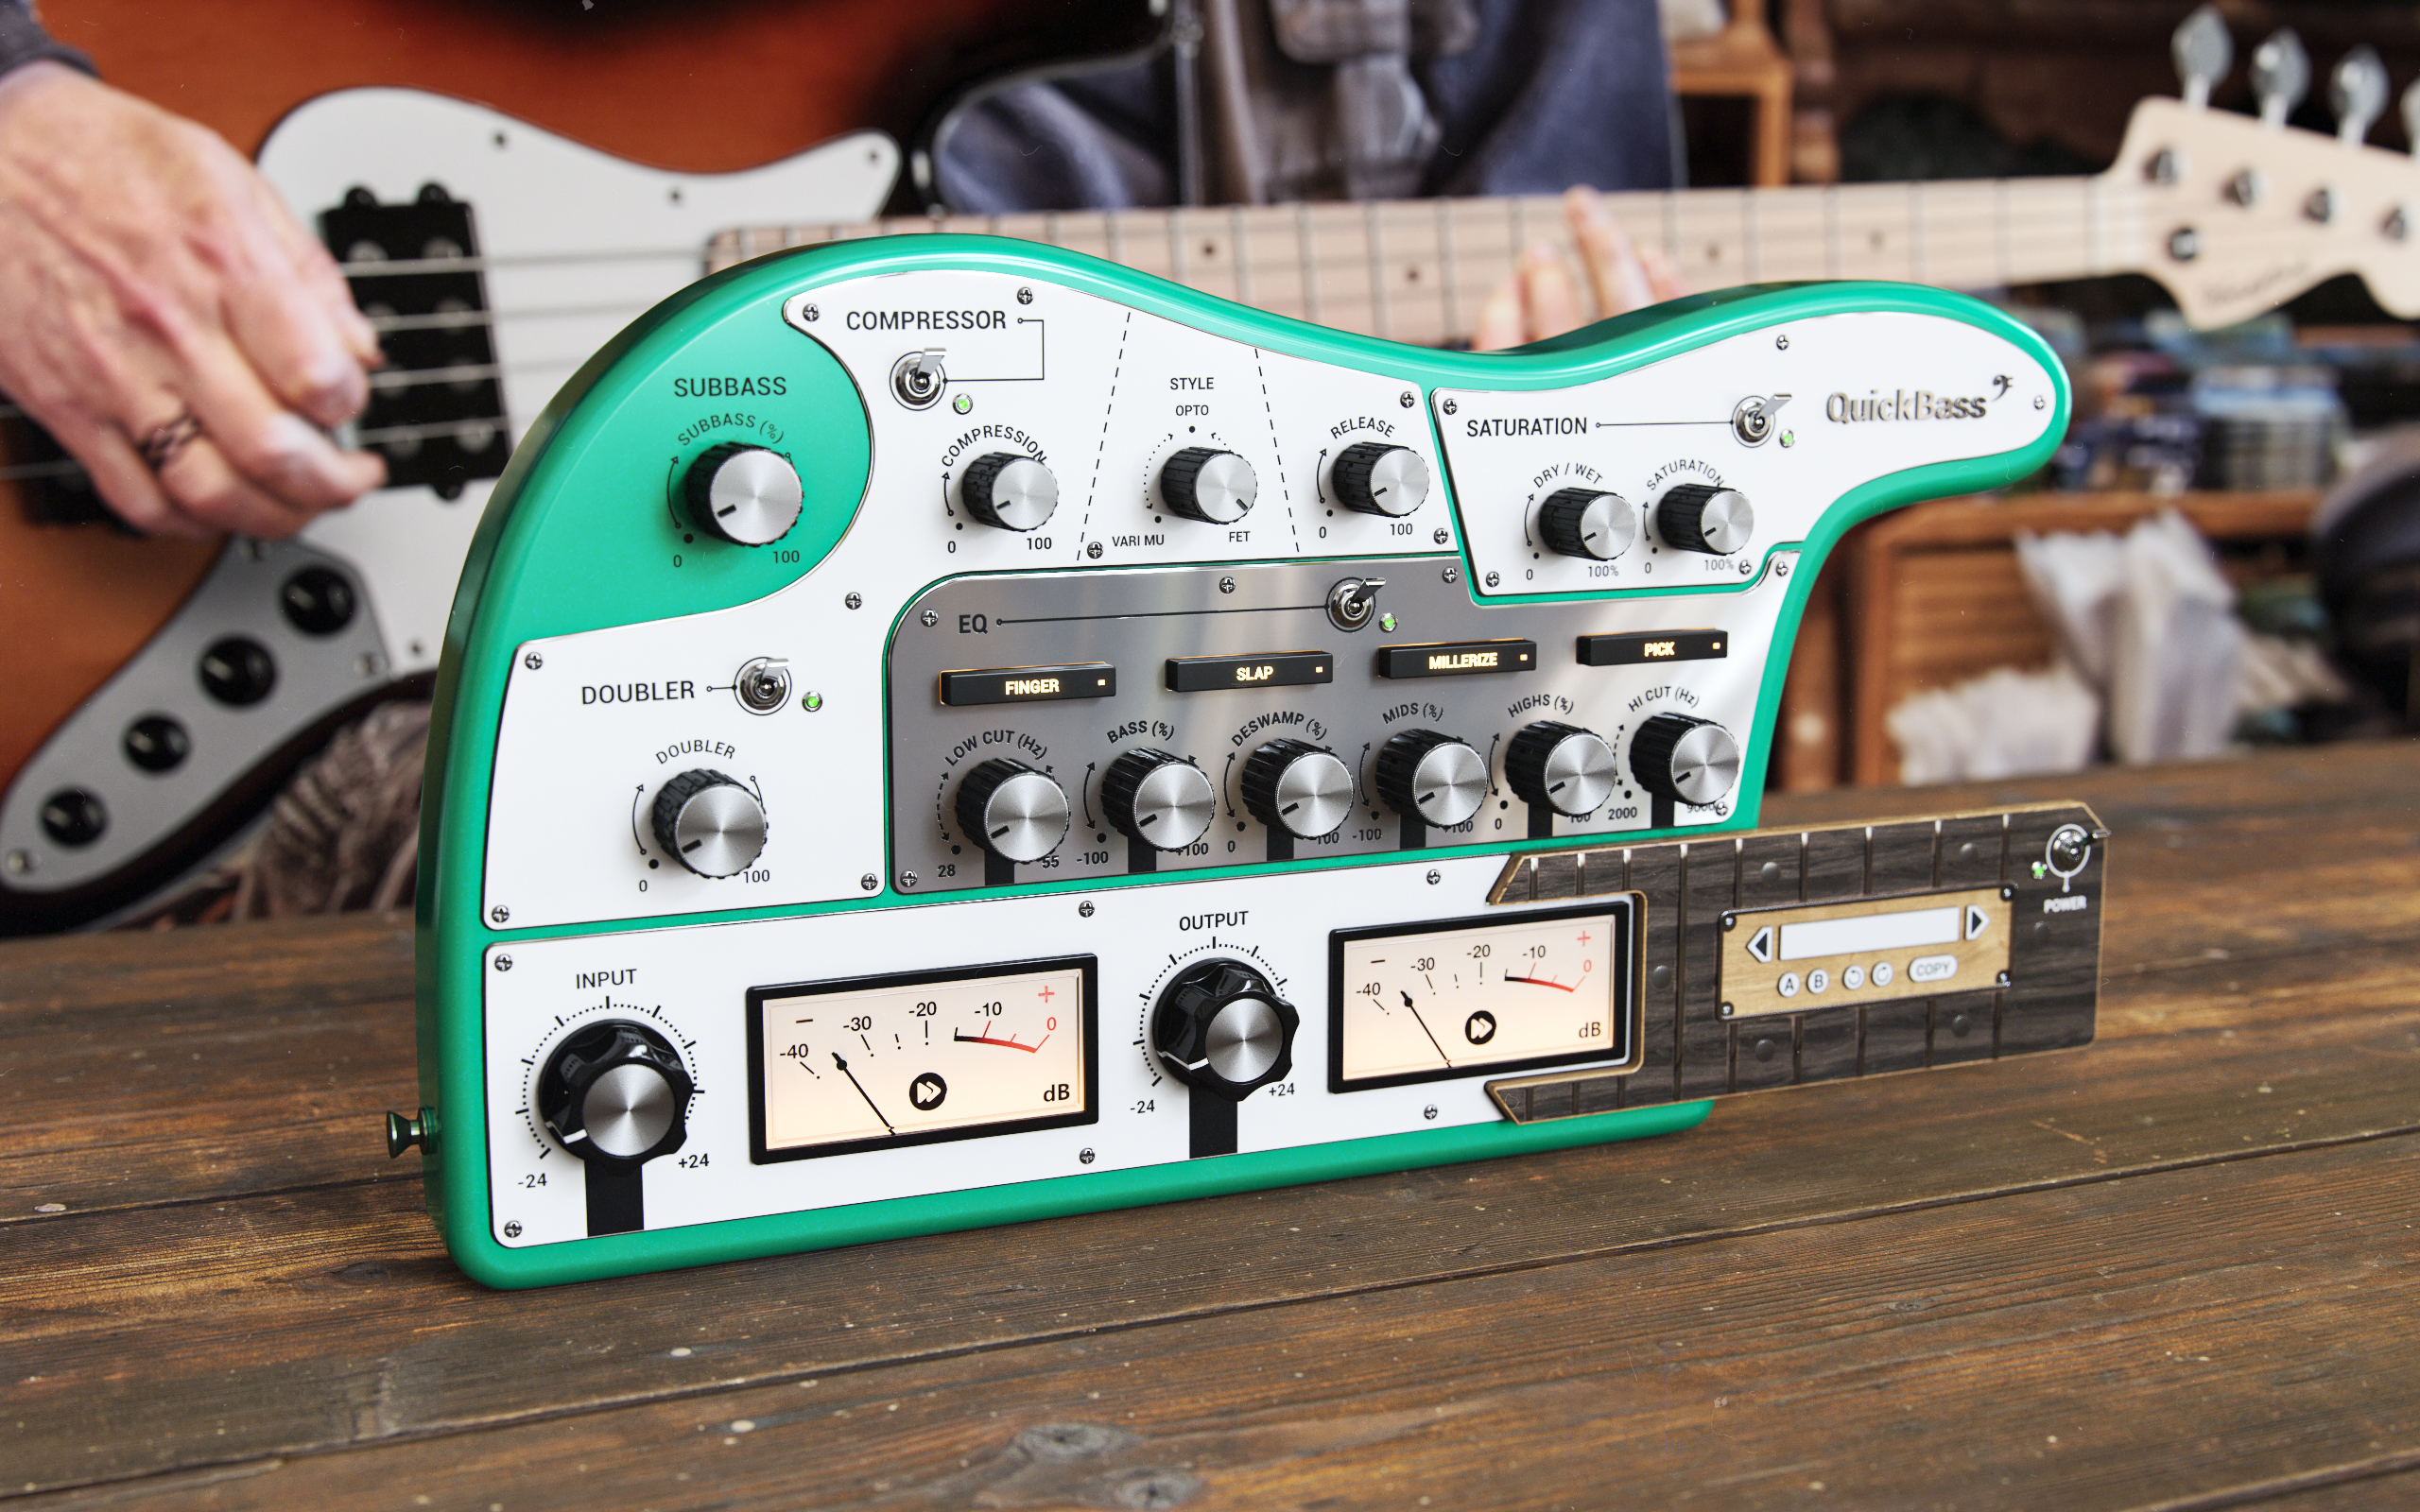
Compression - This effect changes the dynamics of the incoming signal - this knob determines how much compression is applied.
Style - this knob lets you blend different types of compression. Quick bass offers three different simulation types of originally HW compression:
Opto compression, which is made with the audio signal feeding a lighting element (such as an LED), which shines upon a light-sensitive resistor. The resistance of this light-sensitive element informs the compression circuit how much and how quickly to attenuate the audio signal. Think about LA2A
Vari-mu - Tube compression. As the signal feeding these compressors increases, the actual current sent to the grid of their tube decreases, culminating in a reduction in overall level. In other words, the tube is the main engine driving the gain reduction. Think about legendary 670
Fet compression - FET stands for “Field Effect Transistor,” FET compressors like 1176 are capable of exceedingly fast attack times, with a lot of colour.
Release - refers to how long the compressor will take to relax the compression once the signal has fallen below the threshold. The longer the release time, the longer the compressor holds on to the signal, and the smoother the sound.
EQ
EQ is an effect that adjusts the amplitude of audio signals at particular frequencies, here chosen especially for the right style and right sound of the bass player style:

Finger - tuned especially for playing style with fingers
Slap - especially for slapping technique on the bass
Millerize - with untypical settings for slapping bass based on famous player style
Pick - especially for rock playing with a pick.
LowCut - Hipass filter on bass frequency. It is good for the cleaner sound of bass. You can choose from 28 to 55 Hz.
Bass - adding or dropping down the level of basses in the signal. -100 to 100%. 0 is the default value.
DeSwamp - dropping down the level of ugly frequencies in lower mids, higher basses. 0-100%
Mids - Adding or dropping down the level of mids in the signal. -100 to 100 % . 0 is default - bypassed in Millerize setting.
Highs - Adding a level of highs in the signal. 0-100%
HiCut - Cutting highs of the bass. The highest frequecies are unnecessary for the bass guitar signal. You can cut from 2000 to 9000 Hz.
Saturation

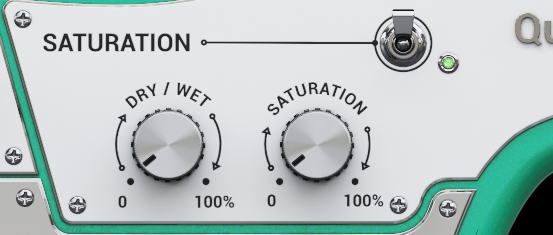
Saturation - we simulated the sound of different distortions of overdriven electronic elements as tubes and transistors. From pleasant subtle "analogish" colour to total distorted fuzzy mayhem. 0-100%
Dry/Wet - the parallel level of the clean and distorted signal 0-100%
SubBass
SubBass - adding very low sub-bass frequencies to the bass signal 0-100%
Doubler
A doubler is a famous effect where the sound is decorrelated by the initial detune and the tuning can be further modulated. The modulation signal is mixed with the dry signal
I/O Section

INPUT - Sets the input gain between +/-24 dB. The meter indicates the input signal volume.
OUT - Sets the output volume between +/-24 dB. The meter indicates the overall output level.
Power - the switch bypasses the plugin when LED shines red. Green for enabled.
Right-click Menu
Right-click anywhere in the plugin background with the right mouse button and you will get access to following features.
Change oversampling settings (Plugins that support oversapling only)
Scale GUI precisely by per-cent.
Get the version info.
Access product web page, reach support and access online documentation.
Contact support
Open presets folder (to add, arrange or delete presets manually)
Activate/Deactivate the plugin
Access Licence manager (to activate or deactivate the plugin or several plugins at the same time)
Disable/Enable GPU Acceleration.
Disable/Enable Intellingent sleep on silence function that disables the plugin when no sound is on input or output to save the CPU power.
Right-click any control (knob, button) to access help for the particular parameter.
Double-click Menu
Some parameters let you access more accurate numeric settings by double-clicking the knobs.
Presets and more

A, B and Copy buttons - The plugin remembers 2 sets of settings, A and B. Clicking any of these 2 buttons switches between these 2 settings. The selected one is highlighted. This is a great way for A/B checking and selecting the best settings. "Copy" button copies the current settings to the other slot (if A is currently selected, the button will copy the current settings to slot B).
The plugin comes with a set of presets, which should do the trick for most cases or give you a good starting point when tweaking your sound. Access them using the right and left arrows, or by clicking the preset field directly. You can save and manage your own presets there as well. In your computer, presets are stored in the following paths:
Windows:
C:\Users\username\Documents\InstantAudio\QuickBass
macOS X:
HOME/Documents/InstantAudio/QuickBass
Installation and maintenance
Installation is a quick and simple process involving downloading and using a standard installer on both platforms, Windows and Mac OS X. The installer places the plugins and presets into proper locations so that your DAW can easily find it. The plugin is available for all relevant interfaces: VST, VST3, AAX and AU. Note that on OS X since High Sierra you may need to restart your computer to make your DAW find new plugins.
If you find yourself in trouble, please contact us via support@unitedplugins.com.
Updating
Updating the plugin to the newest version is as simple as using the newest installer.
Uninstallation
Windows: You can either use the link to the uninstaller in the start menu by typing Quick AG for example or it can be accessed via Control panels / Applications /
macOS X: First delete the plugin files manually from :
AU: /Library/Audio/Plug-Ins/Components
VST: /Library/Audio/Plug-Ins/VST
VST: /Library/Audio/Plug-Ins/VST3
AAX: /Library/Application Support/Avid/Audio/Plug-Ins
Then if you really want to get rid of all data created by the plugin, remove the following folders as well:
HOME/Documents/InstantAudio/QuickBass
HOME/Library/Application support/InstantAudio/QuickBass
Note: Since OS X 10.7 (Lion), many folders are marked as hidden by default. To make them visible again in Finder, please follow this tutorial:
https://ianlunn.co.uk/articles/quickly-showhide-hidden-files-mac-os-x-mavericks/
Trial and activation
Quick AG is initially in demo mode, which lets you evaluate the plugin. Try it in your mixing/mastering sessions and make sure it really does the trick. When ready, purchase a licence from our shop or any of our resellers. You will receive a so-called licence file, which you download to your computer. The plugin displays an ACTIVATE button when in trial mode. Click it and select the licence file. The plugin will check the licence and activate the licence on your computer. After you restart your DAW, the plugin will be activated and will work indefinitely without restrictions. You can use the plugin on all your computers.
Support
Now that you’ve taken the time to learn all about Quick AG, enjoy and make your sound awesome! If our plug-ins helped you take your production to the next level, let us know, we’d love to hear from you and what you were able to create with our software.
If you encountered any problems, we offer free technical support for all registered users. Start with the frequently asked questions here:
http://www.unitedplugins.com/faq
If you need further assistance, you can find our Customer Support contact form at:
http://www.unitedplugins.com/contact
You can also reach our support staff by e-mail at:
support@unitedplugins.com


